
![]() By Gerry Sullivan
By Gerry Sullivan
Date of Creation: 2019-11-23
Last Update: 2023-02-23
Normally, the system administrator will create individual teacher accounts. Teachers will then define their individual courses and classes in the MAD. Finally, teachers will import a list of their students for each class via a single CSV file.
Note: It is critical to be meticulous when using this approach, as any type of file formatting error can potentially corrupt the entire database without any provision for retroactive repairs.
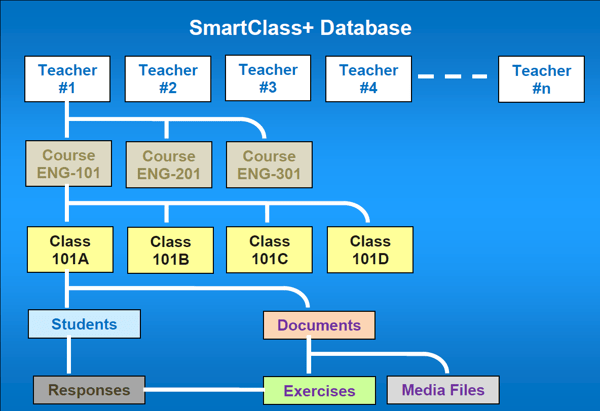
TCCS File Format for a local database (non-cloud)
The TCCS Roster uses the following format, and as with student rosters, there are formats for LDAP and No LDAP environments:
- LDAP enviroment:
| ##1, <teacher username> |
| ##2, <course name>, <class name> |
| <student username> |
| <student username> |
| ##2, <course name>, <class name> |
| <student username> |
| <student username> |
| ##1, <teacher username> |
| ##2, <course name>, <class name> |
| <student username> |
| <student username> |
| ##2, <course name>, <class name> |
| <student username> |
| <student username> |
- Non LDAP enviroment:
| ##1, <teacher first name>, <teacher last name>, <teacher username>, <password> |
| ##2, <course name>, <class name> |
| <student first name>, <student last name>, < student username>, < password> |
| <student first name>, <student last name>, < student username>, < password> |
| ##2, <course name>, <class name> |
| <student first name>, <student last name>, < student username>, < password> |
| <student first name>, <student last name>, < student username>, < password> |
Enabling Access to the TCCS Import Function
To enable access to the TCCS Import Function, the following conditions must be met:
- The database must be a local school-hosted database (e.g. not a cloud database)
- The system administrator must be selected (default administrator will not work).
When these conditions have been met, login to the HUB application as the administrator. Next, hold down the CTRL+SHIFT keys and click on the Auto-process On button.
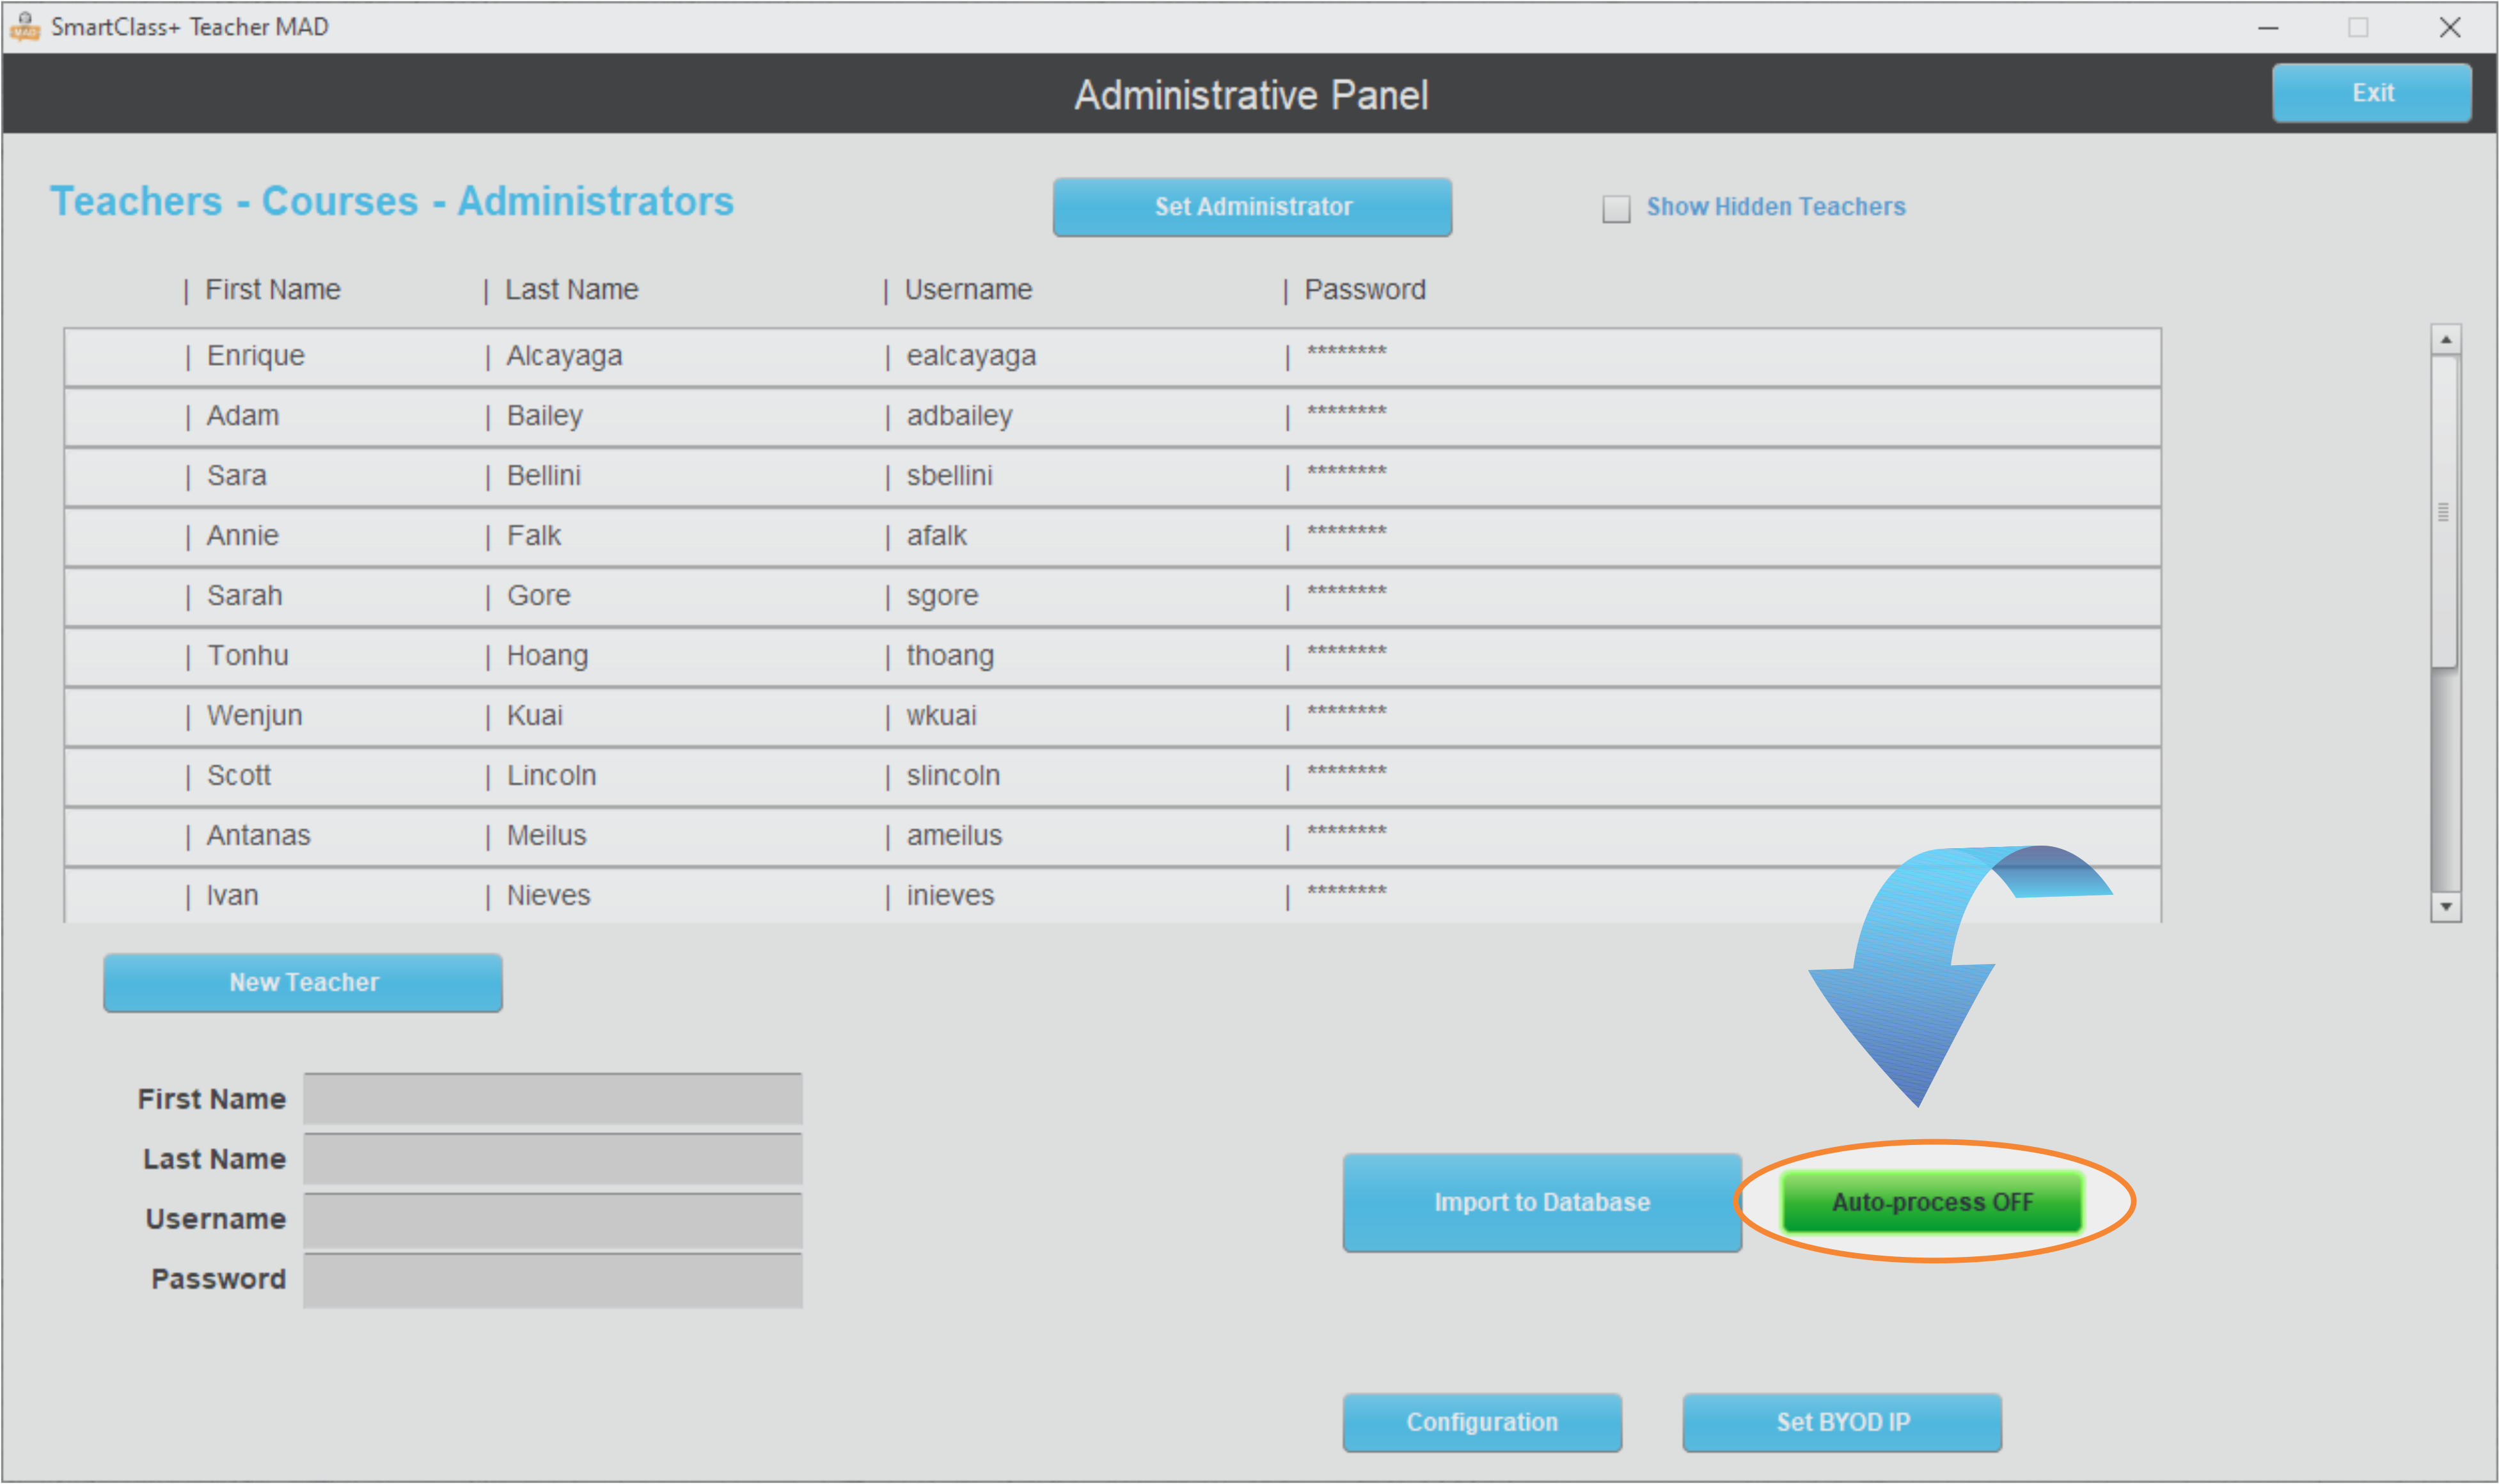
This will activate the Import to Database button.
Import to Database
Click on the Import to Database button, and select the CSV file you wish to import.
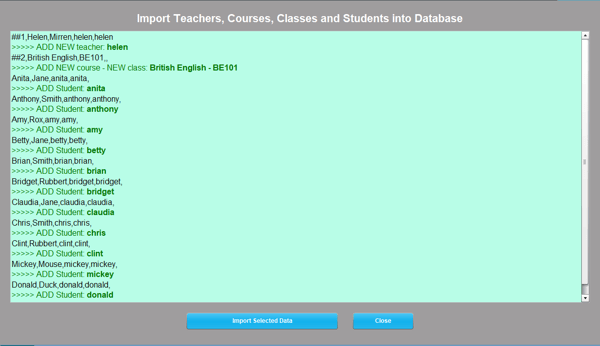
The contents of the file are shown in the panel above. It is extremely important to ensure that all the data is acknowledged in Green and that the data is shown exactly as expected.
When you are confident that all is good, click on the Import Selected Data button to complete the importation.
Contact us if you would like more information.