
 By Service Team
Date of Creation: 2019-11-23
Last Update: 2026-07-16
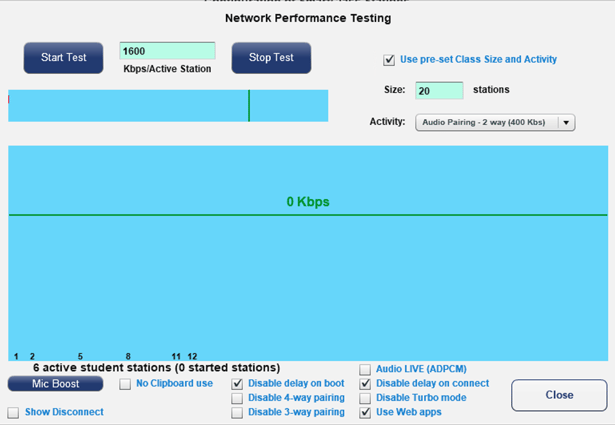
The Test Network button opens the above configuration page.
This utility is extremely useful for benchmarking the performance of a WiFi network to better match user expectations with SmartClass capabilities. To use this utility, at least some of the student stations must be connected.
The upper right portion of this panel is used to structure the type of test to be done. In the above example, the activity is set to Audio Pairing, and the number of student stations to be simulated is set to 20.
From these parameters, SmartClass calculates the total load to be applied to the network. The formula used is:
Data = # of stations (e.g. 20) x Activity bandwidth (e.g. 400 Kbps) = 8000 Kbps
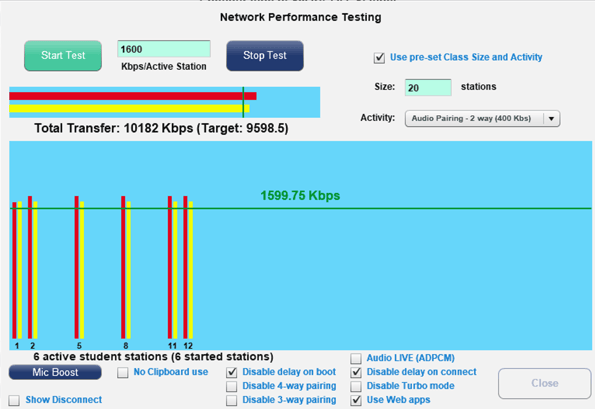
To provision some allowance for overhead, a buffer of 20% is added to this total:
Transfer Data Target = data (e.g. 8000 Kbps) x 1.2 = 9600 Kbps
This transfer is shared evenly over the number of active stations:
Total Data Transfer = Transfer Data Target / # of stations (e.g. 2) = 4800 Kbps
Use Web Apps
The most important feature here!
Selecting Use Web Apps, will instruct the Hub (SC Media Teacher and SC Media Student) to open the SmartClass Web App, in place of the installed Hub app. You will have access to the same Hub function in a faster Web version.
Audio LIVE (ADPCM) (unchecked recommended)
In some cases where the teacher station is not powerful enough, when using a WiFi network, the more aggressive audio compression codec (ADPCM) is normally configured system-wide through the LIVE system administrator panel. Only select this option if the audio quality is not good.
Disable delay on connect (checked recommended)
By default, when student stations are configured with automatic connection capability, a randomized delay is used to prevent all students from trying to connect at the same time. In strong networks, this delay can be disabled by checking the Disable delay on connect box.
Disable Turbo Mode (unchecked recommended)
By default, when all devices are capable of supporting accelerated screen sharing (called Turbo mode), this mode is automatically invoked. You can disable Turbo mode by clicking on the Disable Turbo mode button.
Disable Delay on Boot (checked recommended)
By default, when a computer starts up, there is a minimum startup delay time that each application must meet to start up. This is a delay that allows the system itself to load the desktop and Windows services. But, if we want to eliminate this delay (Only for SmartClass, it will not affect the rest of the programs) we must check this box.
Disable 4-way Pairing, Disable 3-way Pairing
For connections with high latency (basically, delay in sending information packets, in this case, audio); By activating this box, the matching exercises with more than 2 or 3 simultaneous students are disabled.
No clipboard Use
Checking this box disables the use by students of the copy (ctrl-c) and paste (ctrl-v) options.
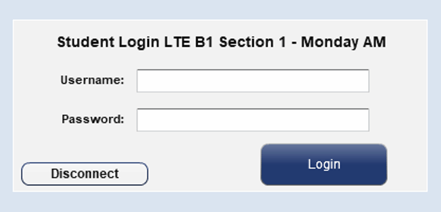
Show Disconnect
When selected, it offers students the opportunity to disengage from the Live session. At the login page, they will be able to click on the Disconnect button and use the station without interference from the teacher. They will not participate in any Live activity. They are still able to log in to the Hub activities.
Mic Boost
The new microphone boost function controls a software-based microphone amplification scheme which is independent of the Windows® microphone management system.
Microphone boost is accessed from the Configuration panel by first clicking on the Test Network button and then selecting the Mic Boost button.
This utility compensates for low-powered microphones.
The Microphone Boost Settings panel is then displayed, as shown below:
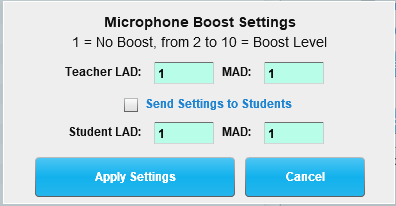
This utility manages the microphone boost settings for the teacher’s microphone – for both LIVE (formerly LAD) Intercom and HUB (formerly MAD) local recording – and the settings for all student microphones – for both LIVE Intercom and HUB local recording.
The boost level for all fields ranges from 1 (No boost) up to 10 (Max boost). 4 should be the maximum boost used. 5 and above will induce a strong background noise.
Click on Apply Settings to save any changes.
Contact us if you would like more information.