
![]() By Fernando Solórzano
By Fernando Solórzano
Date of Creation: 2019-11-24
Last Update: 2026-07-16
What Is Wake-on-LAN?
Wake-on-LAN (sometimes abbreviated WoL) is an industry-standard protocol for waking computers up from a very low power mode remotely. The definition of “low power mode” has changed a bit over time, but we can take it to meanwhile the computer is “off” and has access to a power source. The protocol also allows for a supplementary Wake-on-Wireless-LAN ability as well.
SmartClass LIVE has the WoL feature, enabling you to Power-Up/Logoff/Shutdown student's stations. This feature is located on the lower right corner of the window, as you can see in the image below (Student Stations button):
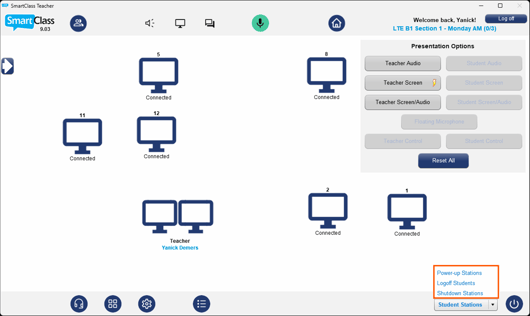
Logoff and Shutdown will only apply to student station sthat are showing on the Live dashboard.
Wake-on-LAN is dependent on two things: your motherboard and your network card. Your motherboard must be hooked up to an ATX-compatible power supply, as most computers in the past decade or so are.
Your Ethernet or wireless card must also support this functionality. Because it is set either through the BIOS or through your network card’s firmware, you don’t need specific software to enable it. Support for Wake-on-LAN is pretty universal nowadays, even when it’s not advertised as a feature, so if you have a computer built in the past decade or so, you’re covered.
Note: While most built-in cards on motherboards don’t need this step, discrete network cards often need a 3-pin cable attached to the motherboard to support Wake on LAN. Do your research online before you buy, so you’re not disappointed later on down the line.
How to Enable Wake-on-LAN on Your System
To get started using Wake-on-LAN, you’ll have to enable it in a few places—usually your BIOS and from within Windows. Let’s start with the BIOS.
In the BIOS
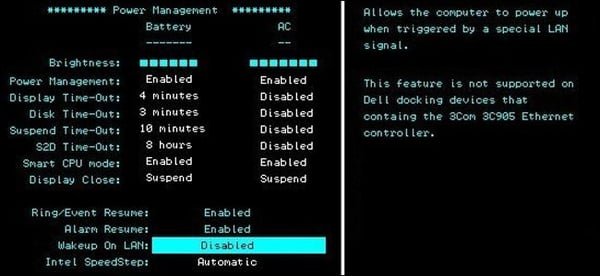
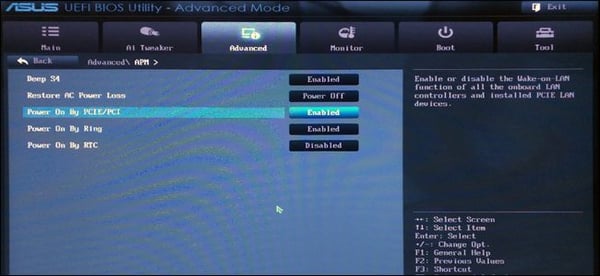
Most older computers and many modern ones have their Wake-on-LAN settings buried in the BIOS. To enter the BIOS, you’ll need to press a key as you boot your computer—usually Delete, Esc, F2, or something else (your boot screen will give you instructions on what key to press to enter setup). Once you’re in, check under Power Management or Advanced Options or something of that sort. here are some examples of BIOS and Wake on LAN feature:

Note: It isn’t always easy or obvious to find the relevant option, since BIOS menu systems vary so widely. If you’re having trouble, check your computer or motherboard’s manual or do a quick Google search. Remember that most manufacturers offer PDF versions of documentation online.
In Windows
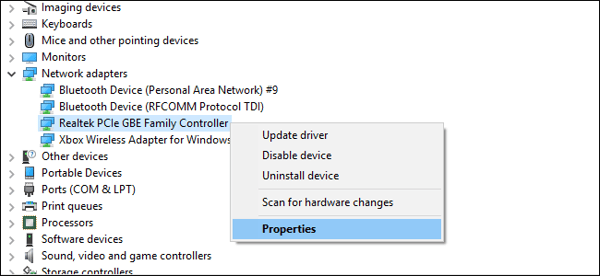
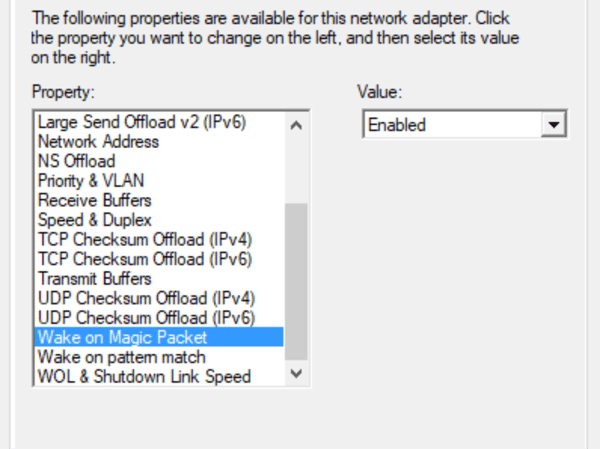
You’ll also need to enable Wake-on-LAN in your operating system. Here’s how it goes in Windows. Open the Start menu and type “Device Manager”. Open the Device Manager and expand the “Network Adapters” section. Right click on your network card and go to Properties, then click on the Advanced tab.
Scroll down in the list to find “Wake on Magic Packet” and change the Value to “Enabled.” You can leave the other “Wake on” settings alone. (Note: one of our test rigs didn’t have this option, but Wake-on-LAN still worked fine with the other settings in this guide enabled properly—so don’t fret if it isn’t there.)
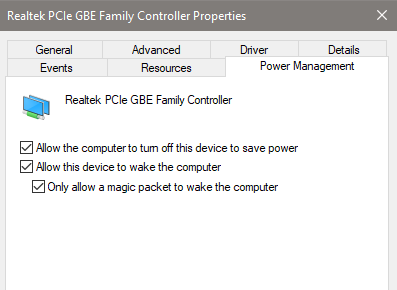
Now click the Power Management tab, and make sure the “Allow this device to wake the computer” and “Only allow a magic packet to wake the computer” boxes are enabled. Click OK when you’re done.
Note: Sometimes, Wake-on-LAN may only work if you send the magic packet from a computer on your existing network. depending on your security rules, maybe you’ll need to set up your router to open UDP ports number 7 and 9, specifically for the MAC address of the PC you’re connecting to.
Contact us if you would like more information.